Following my last post about Agile PLM 9.2.2.1 – Part I, in this post I’ll show, step by step, how to install Agile PLM 9.2.2.1 system.
Database Node Installation - Pre Requisites
1) If server is DHCP configured you should setup a loopback (10g installation requirements)
a. Control panel -> Add hardware
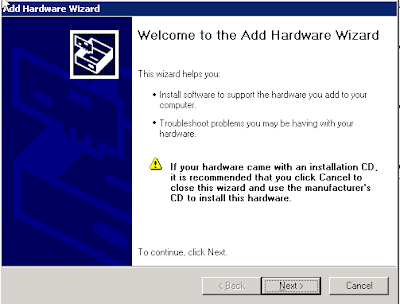
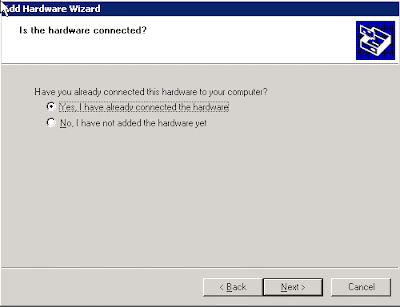
b. Choose: Yes, I have already connected the hardware
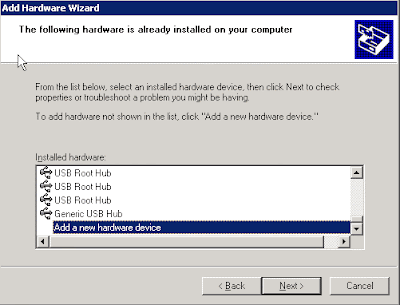
c. Choose: Add a new hardware device (the last item on list)
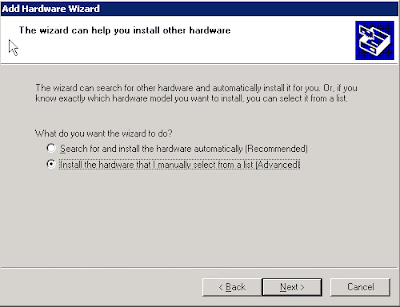
d. Choose: Install the hardware that I manually select from a list
e. Choose: Network adapters
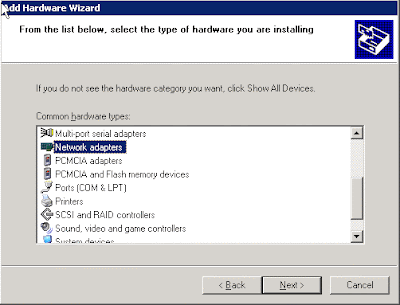
f. Choose at the left side: Microsoft at right side choose: Microsoft loopback adapter
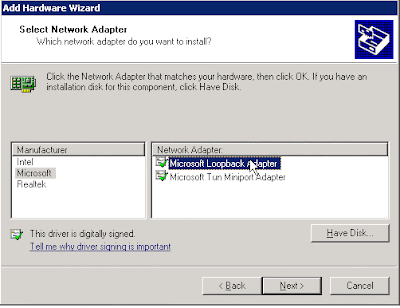
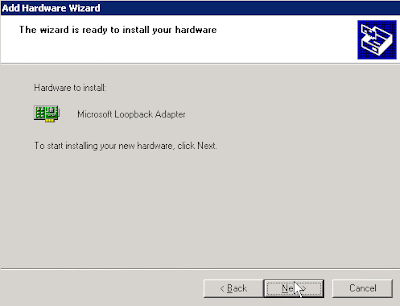
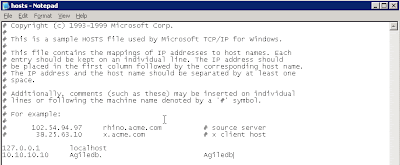
g. Edit the server host file at c:\windows\system32\driver\etc\hosts
Add the following line:
10.10.10.10 agiledb.domain agiledb
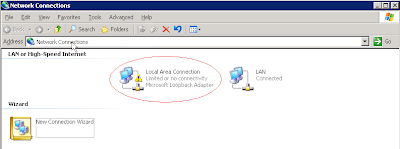
h. Navigate to network connections: Start -> settings -> Network Connections
i. Right Click on Local Area Connection – Microsoft Loopback Adapter -> properties
ii. Select TCP/IP -> properties
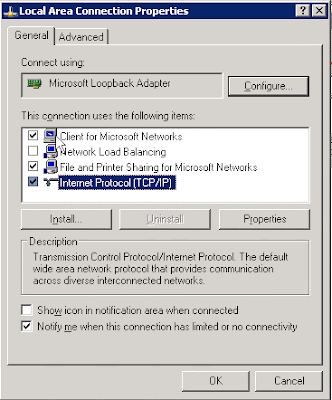
iii. Edit the ip address to 10.10.10.10
iv. Edit the subnet mask to 255.255.255.0

2) Restart the server
Oracle Database 10.2.0.1 installation
1) Run database installer – setup.exe (from database directory)
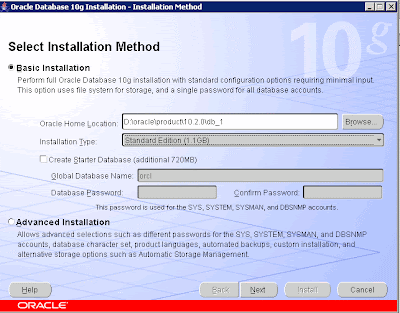
2) Select Basic installation – Standard Edition
a. Oracle Home Location: d:\oracle\product\10.2.0\db_1
b. Uncheck the Create Starter Database
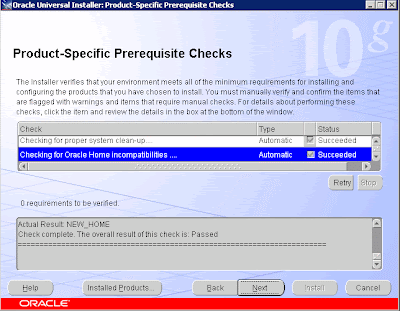
3) Review prerequisite checks
4) Click on Install…

5) Exit
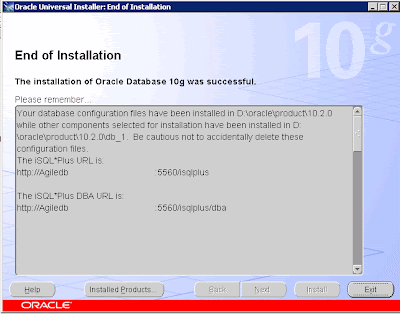
Database Companion Installation
1) Run the installer – setup.exe (from companion directory)
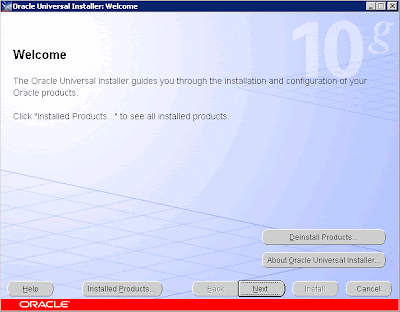
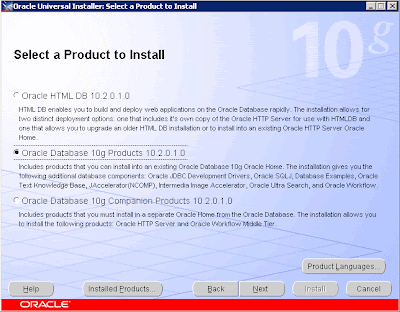
2) Select Oracle Database 10g Products 10.2.0.1.0
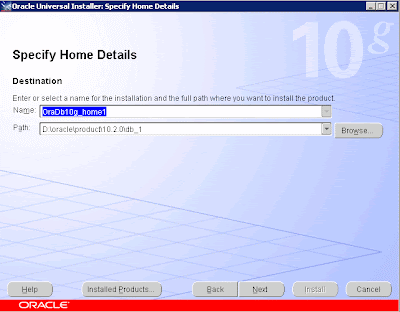
3) Specify Home details:
a. Name: OraDb10g_home1
b. Path: D:\oracle\product\10.2.0\db_1
3) Review prerequisite checks
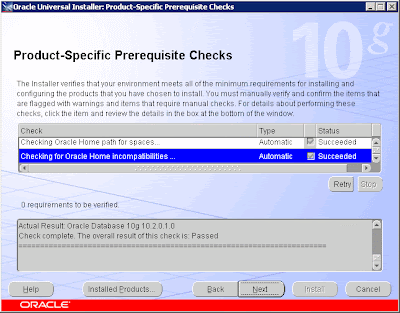
4) Install…
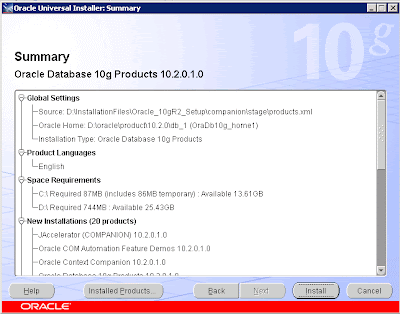
5) Exit
Agile Database Creation
1) Copy the “Platform” directory from Agile Disk2 directory to Agile Disk1 directory to the setup.exe level
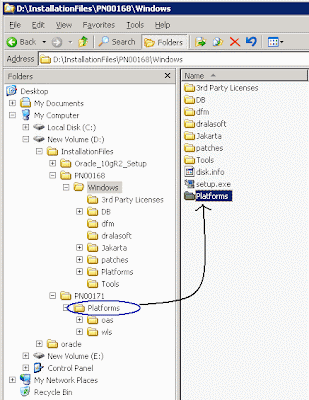
2) Run [Disk1]:\windows\setup.exe
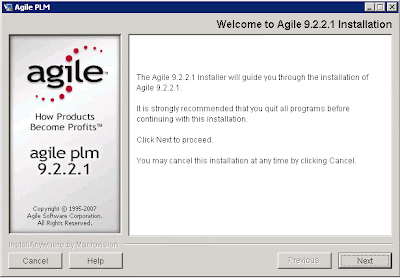
3) Accept license agreement
4) Enter the license key and user name.
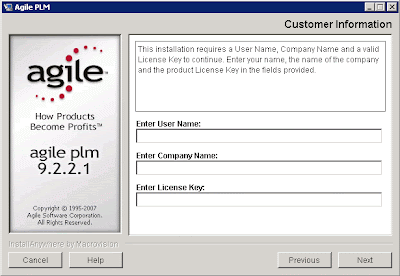
5) Select : Database Server only

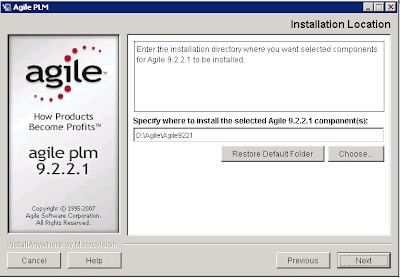
6) Enter the location to install the selected Agile 9.2.2.1 components:
D:\agile\agile9221
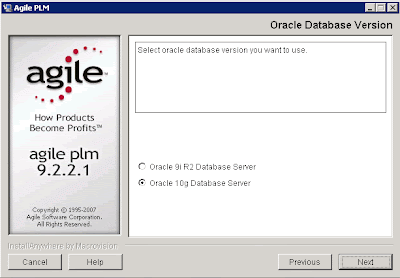
7) Select Oracle 10g Database Server
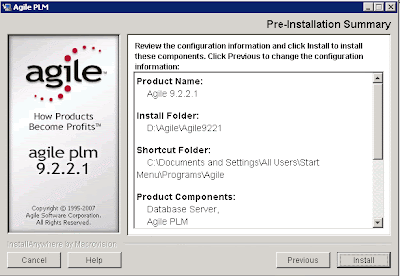
8) Install
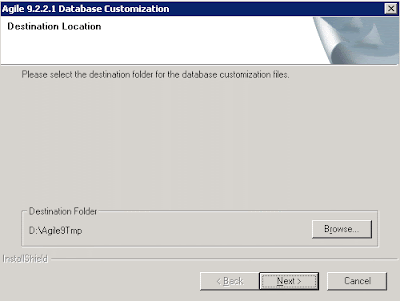
9) Destination folder for database customization files: d:\Agile9Tmp
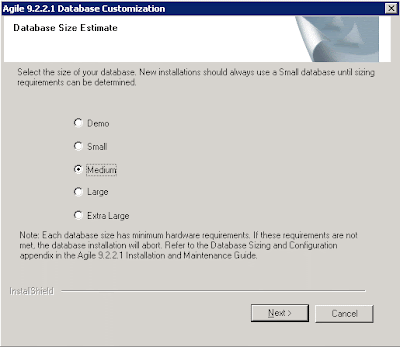
10) Select “Medium” Database size
For more information regarding each possibility - small, medium, large... - read the Capacity Planning Guide
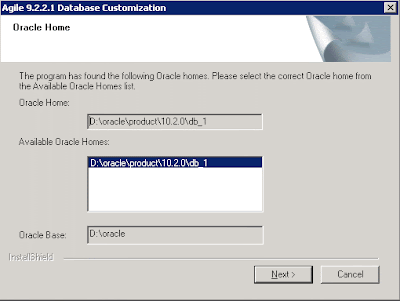
11) Select the previous installed oracle home
12) Oracle SID: agile9

13) Enter passwords for Sys and System and user name and password for Agile schema.
14) Click some next’s…
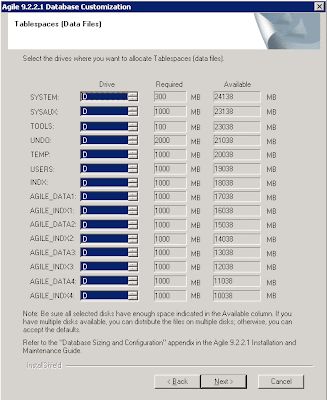

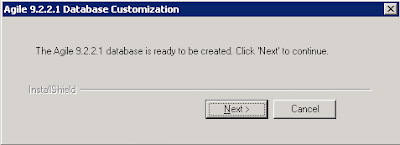
15) Agile installation will create the database
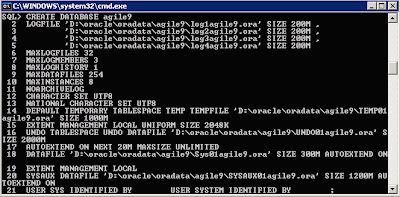
16) Done
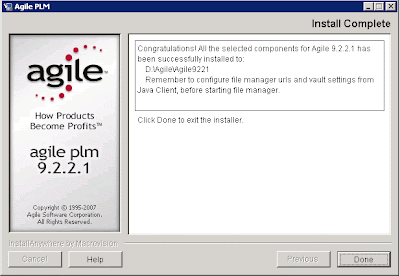
Configure Database Listener
1) Navigate to: Start Menu -> Programs -> Oracle - OraDb10g_home1 -> Configuration and Migration Tools -> Net Manager
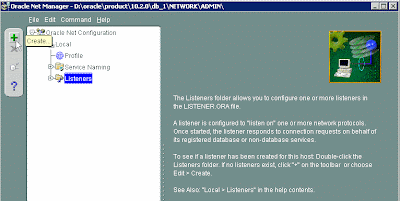
2) Create new Listener, Name: Listener

3) Select Database Services from the drop down list
a. Click on Add database
b. Global Database Name: Agile9
c. Oracle Home Directory: d:\oracle\product\10.2.0\db_1
d. SID: agile9

4) File -> Save Network Configuration
5) Restart the Listener
a. Lsnrctl stop
b. Lsnrctl start
That’s all for the Agile Database node.Next post I’ll show the Agile 9.2.2.1 Application node installation.
The latest version of Agile PLM is 9.2.2.2, but it's too much new to install it for production..
I installed the Agile PLM 9.2.2.1 on 2 nodes configuration:
1) Agiledb – Oracle Database server NodeC:\ drive – OS only
D:\ drive – Database 10g software and Datafiles
2) Agileapp – Agile Application + IIS + Oracle AS + Agile File Manager NodeC:\ drive – OS only
D:\ drive – Agile 9.2.2.1 applications + Oracle AS
E:\ drive – File Vault (managed by the File Manager)
** Both servers installed with Windows 2003 Server OS.
This post will describe all phases of database node installation, and next post I’ll describe the application node installation.
The Agile Database node installation composed from the following steps:
- Complete all database installation pre requisites
- Oracle Database 10.2.0.1 installation
- Oracle Datbase companion installation
- Agile Database creation
- Listener configuration
Database Node Installation - Pre Requisites
1) If server is DHCP configured you should setup a loopback (10g installation requirements)
a. Control panel -> Add hardware

b. Choose: Yes, I have already connected the hardware

c. Choose: Add a new hardware device (the last item on list)

d. Choose: Install the hardware that I manually select from a list

e. Choose: Network adapters

f. Choose at the left side: Microsoft at right side choose: Microsoft loopback adapter


g. Edit the server host file at c:\windows\system32\driver\etc\hosts
Add the following line:
10.10.10.10 agiledb.domain agiledb

h. Navigate to network connections: Start -> settings -> Network Connections
i. Right Click on Local Area Connection – Microsoft Loopback Adapter -> properties

ii. Select TCP/IP -> properties

iii. Edit the ip address to 10.10.10.10
iv. Edit the subnet mask to 255.255.255.0

2) Restart the server
Oracle Database 10.2.0.1 installation
1) Run database installer – setup.exe (from database directory)
2) Select Basic installation – Standard Edition
a. Oracle Home Location: d:\oracle\product\10.2.0\db_1
b. Uncheck the Create Starter Database

3) Review prerequisite checks

4) Click on Install…

5) Exit

Database Companion Installation
1) Run the installer – setup.exe (from companion directory)

2) Select Oracle Database 10g Products 10.2.0.1.0

3) Specify Home details:
a. Name: OraDb10g_home1
b. Path: D:\oracle\product\10.2.0\db_1

3) Review prerequisite checks

4) Install…

5) Exit
Agile Database Creation
1) Copy the “Platform” directory from Agile Disk2 directory to Agile Disk1 directory to the setup.exe level

2) Run [Disk1]:\windows\setup.exe

3) Accept license agreement
4) Enter the license key and user name.

5) Select : Database Server only

6) Enter the location to install the selected Agile 9.2.2.1 components:
D:\agile\agile9221

7) Select Oracle 10g Database Server

8) Install

9) Destination folder for database customization files: d:\Agile9Tmp

10) Select “Medium” Database size
For more information regarding each possibility - small, medium, large... - read the Capacity Planning Guide

11) Select the previous installed oracle home

12) Oracle SID: agile9

13) Enter passwords for Sys and System and user name and password for Agile schema.
14) Click some next’s…


15) Agile installation will create the database

16) Done

Configure Database Listener
1) Navigate to: Start Menu -> Programs -> Oracle - OraDb10g_home1 -> Configuration and Migration Tools -> Net Manager

2) Create new Listener, Name: Listener

3) Select Database Services from the drop down list
a. Click on Add database
b. Global Database Name: Agile9
c. Oracle Home Directory: d:\oracle\product\10.2.0\db_1
d. SID: agile9

4) File -> Save Network Configuration
5) Restart the Listener
a. Lsnrctl stop
b. Lsnrctl start
That’s all for the Agile Database node.Next post I’ll show the Agile 9.2.2.1 Application node installation.


No comments:
Post a Comment