Showing posts with label Agile. Show all posts

Wednesday, 30 November 2011

How to enable SSL for Agile Proxy server

Following the last post about Agile PLM - Web Proxy Server Installation, in this post I'll show how to enable SSL for Agile Proxy server to make Web access to Agile more secure.
Apply the SSL certificate
  1. Have a signed SSL certificate file (.pfx file) from a Well-known Certificate Authorities (such as VeriSign)
  2. Login to the Agile Proxy server with administrator user
  3. Navigate to: Start -> Administrative Tools -> Internet information services (IIS) Manager
  4. Right click on Agile PLM Web Site -> properties -> Select the Directory Security tab

  5. Click on Server Certificate -> next

  6. Select Import a certificate from a .pfx file -> next

  7. Enter Path and file name of the certificate file (.pfx file) -> next

  8. Enter the password for the certificate -> next
Update the iFS_External File Manager
  1. Open the Agile Java Client
  2. Select 'Admin' Tab -> expand 'Server Settings' -> open 'Locations'
  3. Select the 'File Manager' tab -> Double click on the iFS_External file manager.
  4. Update the File Manager URL from http://... to -> https://...

Now you can login to Agile through the Agile Proxy server via https://servername.domain/Agile/PLMServlet.
When you'll try to work with files (get file or add new) you might encounter the following error:
"The preferred file server : https://servername.domain/Filemgr/AttachmentServlet for user : UserName is down. Please contact the system administrator."

You'll although see the following error within OC4J~home~defaulet~island~1 (at [OASHome]/opmn/logs):
08/09/23 10:23:11 javax.net.ssl.SSLHandshakeException: sun.security.validator.ValidatorException: No trusted certificate found 08/09/23 10:23:11     at com.sun.net.ssl.internal.ssl.BaseSSLSocketImpl.a(DashoA12275)
08/09/23 10:23:11     at com.sun.net.ssl.internal.ssl.SSLSocketImpl.a(DashoA12275)
08/09/23 10:23:11     at com.sun.net.ssl.internal.ssl.SunJSSE_az.a(DashoA12275)
.....
.....

The reason for this error is the certificate for root authority that is not installed on the OAS.
The solution is to import Root CA certificate in the JDK embedded inside OAS:
  1. Open a web browser and access the Agile web client via https://...
  2. Double click on the padlock in the lower right corner of the browser window
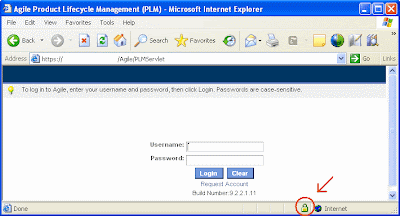
  3. Select Details and then select the "Copy to File" button

  4. Answer the prompts using the defaults and select a filename for the .cer file.


  5. Open a command window (Start -> Run -> cmd)
  6. Navigate to the [OASHome]\jdk\bin directory
  7. Type the following command:

    keytool -import -keystore [OASHome]\jdk\jre\lib\security\cacerts -file c:\temp\AgileProxy.cer
  8. When prompted for the Certificate store password type changeit and then hit Enter
  9. When prompted to load the certificate, type yes and hit enter
  10. Restart OAS
Related: Note 569235.1 - Unable to add or get file attachments because OAS cannot recognize SSL Cert loaded on Proxy server
You are welcome to leave a comment..

Agile PLM - Web Proxy Server Installation

It has been a while since I've posted about Agile PLM stuff..
In this post I'll go through implementing and configuring an Oracle Agile PLM Web Proxy Server.
Previous related posts:
Agile PLM 9.2.2.1 - Part I - Introduction
Agile PLM 9.2.2.1 – Part II – Database Node Installation
Agile PLM 9.2.2.1 – Part III – Application Node Installation

First, who needs a Web Proxy server for Agile PLM?

In order to make Agile PLM accessible to external users, a Web Proxy server should be installed to allow connections from the internet.
This solution include a new server on DMZ behind a firewall which forwards calls to the internal Agile application server.

(* Image from Oracle Agile documentation)
The Agile Web Proxy Server installation consists of the following steps:
  • Installing and Configuring the IIS
  • Install the Agile Web proxy files on the IIS server in the DMZ
  • Configuring IIS as a Proxy Server for Agile PLM
  • Configuring IIS as a Proxy Server for Agile File Manager
  • Create new external File Manager
     
Now I'll show a detailed procedure to install Agile Web Proxy Server on Windows using IIS (Microsoft Internet Information Server).
*** When installing on Unix/Linux OS you'll use Apache as the web proxy server.
Installing and Configuring the IIS
  1. Install IIS on the new Agile Proxy Server (will be called agiledmz)
  2. Login to agiledmz server with administrator user
  3. Navigate to: Start -> Administrative Tools -> Internet information services (IIS) Manager
  4. Right click on Web Sites -> new -> Web Site -> Next


  5. Enter description: Agile PLM Web Site -> Next
     
  6. Enter the following:
    Ip: All unussigned port: 80 host: null -> Next
  7. Path: C:\Inetpub\wwwroot -> Next
     
  8. Check the Read option only -> Next
     
  9. Click Finish  
  10. Right click on Agile PLM Web Site -> properties
  11. Select tab Directory Security -> Under 'Authentication and Access Control' click on Edit -> Uncheck the 'Integrated Windows authentication'
     
  12. Disable the default Web Site:  Right Click on Defaule Web Site -> Stop
     
Install the Agile Web proxy files on the IIS server in the DMZ
  1. Make sure IIS is up and running (Go to services screen - services.msc - and check that "IIS Admin Service" process is in Started state)
     
  2. Execute setup.exe from [INSTALLATION_BASE_DIR]\PN00168\Windows directory
     
  3. Click Next -> accept the license -> Next
     
  4. Enter User name, Company name and License key -> Next
     
  5. Check the Web Proxies only -> Next
     
  6. Specify directory on which agile files will be installed (D:\Agile\Agile9221)-> Next
     
  7. Select Oracle Application Server 10g -> Next
     
  8. Enter the Web Proxy server name (or IP) and port (80) -> Next
     
  9. Enter the server name and port on which Agile application is installed (The Agile Application Server) -> Next
     
  10. Keep the default "Agile" for Agile Application Server Virtual Path-> Next
     
  11. Keep the default "Use internal user account (ifsuser)" -> Next
     
  12. Keep the default "Filemgr" for Agile Primary File Manager’s Virtual Path -> Next
     
  13. Enter Agile's File Manager host name and port (might be the same as Agile Application Server)-> Next
     
  14. Click on Install
  15. Click on Done
     
Configuring IIS as a Proxy Server for Agile PLM
  1. Navigate to: Start > Administrative Tools > Internet Information Services (IIS) Manager
  2. Right click on Agile PLM Web Site -> properties
  3. Click the Home Directory tab -> update the execute permissions to Scripts and Executables
     
  4. Click the ISAPI Filter tab -> click Add 
  5. Filter name: oproxy , Executable: D:\Agile\Agile9221\AgileProxies\oracle_proxy.dll -> Ok -> Ok
     
  6. Right click on Agile PLM Web Site -> New -> Virtual Directory -> Next
     
  7. Alias: oproxy -> Next
     
  8. Path: D:\Agile\Agile9221\AgileProxies -> Next
     
  9. Check the Read and Execute -> Next -> Finish
     
  10. Select the Web Service Extensions -> Select the All Unknown ISAPI Extensions -> Click Allow -> Click Yes
     
  11. Close IIS Manager window
  12. Restart IIS from services screen
  13. Right Click on Agile PLM Web Site -> properties -> select the ISAPI Filters tab -> you should see a green arrow pointing up for oproxy.
     

Configuring IIS as a Proxy Server for Agile File Manager
  1. Login to the File Manager server
  2. Note the Connector Port number from [AGILE_HOME]\Tomcat\conf\server.xml
     
    <!-- Define a Coyote/JK2 AJP 1.3 Connector on port 8009 -->
        <Connector port="8009" enableLookups="false" redirectPort="8443" debug="0" protocol="AJP/1.3"/>
  3. Edit jk2.properties from [AGILE_HOME]\Tomcat\conf
    Add the following line at the end and save the file:

    channelSocket.port=8009
       
  4. Login to agiledmz - (The Web Proxy Server)
  5. Navigate to: Start > Administrative Tools > Internet Information Services (IIS) Manager
  6. Right click on Agile PLM Web Site -> properties
  7. Click the ISAPI Filter tab -> click Add
  8. Filter name: Jakarta IIS Connector , Executable: D:\Agile\Agile9221\AgileProxies\isapi_redirect.dll -> Ok -> Ok
     
  9. Right click on Agile PLM Web Site -> New -> Virtual Directory -> Next
     
  10. Alias: Jakarta -> Next
  11. Path: D:\Agile\Agile9221\AgileProxies -> Next
  12. Check the Read and Execute -> Next -> Finish
     
  13. Open the workers.properties file in [AGILE_HOME]\AgileProxies and make sure the File Manager server is correct in the following entry:
     
    worker.ajp13w.host=<File Manager host name>
       
  14. Restart IIS 
  15. Right Click on Agile PLM Web Site -> properties -> select the ISAPI Filters tab -> you should see green arrows pointing up for both oproxy and jakarta.
     

Create new external File Manager
  1. Open the Agile Java Client
  2. Select 'Admin' Tab -> expand 'Server Settings' -> open 'Locations'
  3. Select the 'File Manager' tab -> click on the 'new' icon (you must have license for unlimited File Managers to enable it)
  4. Enter the following:
    Name - iFS_External
    File Manager URL - Use the web proxy server name (registered on the web) or IP, e.g. http://agile.company.domain/Filemgr/AttachmentServlet or http://111.11.11.111/Filemgr/AttachmentServlet
    Enabled - Yes
    Primary File Server - No
     
  5. Click on 'Ok'
  6. Expand the 'User Settings' -> open 'Users' -> find the user you want to use the external iFS and open his settings -> select the 'Preferences' tab -> update the 'Preferred File Manager' to 'iFS_External'.
     
*** Important Note Agile architecture compels you to configure specific File Manager for each user.
Users configured to use the internal iFS will be able to utilize the File Manager from within the network only! They'll be unable to utilize the external iFS when login to Agile through the Agile Web Proxy Server.
The same behaviour for users configured to use the external iFS - They will be able to utilize the external iFS only.
 
Now you can login to agile from the internet through the Agile Web Proxy Server.
Use the following URL to get the login screen:  
http://[Agile Web Server Proxy IP or Name]/Agile/PLMServlet
Next post I'll show how to secure connections to Agile through the Proxy server using SSL (https) connection.
You are welcome to leave a comment and/or share your experience with Agile installation.

Agile PLM 9.2.2.1 – Part III – Application Node Installation

This is the 3rd (and last..) post about Oracle Agile 9.2.2.1 installation.
In this post we will see the Agile application node installation step by step including all Agile application required components.


The Agile Application node installation composed from the following steps:- Complete all application installation pre requisites
- Oracle Application Server 10.1.2.0.2 Installation
- Oracle Applications Server Patch
- Agile Application Installation
- Agile Viewer Installation
- Deploy Agile application on Oracle Application Server
- Verify Installation
- Configure IIS as a Proxy Server for Agile PLM
- Configure File Manager with IIS
- Verify File Manager installation


Prerequisites
1) Copy Platform directory from Disk2 to Disk1 to the setup.exe level
2) Make sure Microsoft IIS (Internet Information Services) is installed on this box.

*** It is important to install MS IIS before proceeding with the Oracle AS 10.1.2.0.2 installation, otherwise you might get into port conflict between IIS and Oracle AS 10.1.2.0.2.

Oracle Application Server 10.1.2.0.2 Installation

1) Run installer - setup.exe (from Disk1 directory)


2) Oracle Home destination:
a. Name: oracleas1
b. Path: d:\OraHome_1


3) Language: Choose the appropriate languages.


4) Check the Administrative privileges


5) At Select Configuration Options window, leave the upper 2 options checked only


6) Port configuration: Automatic


7) Fill in the Instance name and ias_admin password:


8) Install


9) Exit


10) Shutdown Oracle AS:
a. Open a cmd window
b. cd oraHome_1\bin
c. emctl stop iasconsole
d. opmnctl stopall


Oracle Applications Server Patch Installation

1) Open a cmd window
a. set ORACLE_HOME=d:\OraHome_1
b. cd [Installation Dir]\Windows\patches\oas101202\OPatch
c. opatch apply d:\ [Installation Dir]\Windows\patches\oas101202\OPatch\3992805


2) Type "Y" (for : Is this system ready …?)


Agile Application Installation

1) From Disk1: cd [Installation Dir]\Windows
2) Execute setup.exe


3) Accept the license agreement
4) Enter license & username


5) Select Applications Server + File Manager + Web Proxies


6) Location to install Agile application: D:\agile\Agile9221


7) Select Oracle Application Server 10g (10.1.2.0.2)


8) Select Standalone Installation


9) Enter Oracle Application Server Home directory: d:\OraHome_1


10) Click on Use Existing


11) Choose: No, use a Database for authentication


12) Hostname: agileapp.[domain]


13) Web Server information: agileapp.[domain]:80


14) Agile viewer information: agileapp.[domain]:5099


15) Database details:
a. Agile Database Host Name: agiledb
b. Agile Database Port: 1521
c. Agile Database SID: agile9
d. Agile Database User: agile


16) Virtual path: Agile


17) At File Manager User Authentication window select: Use Internal user account


18) File Manager Virtual Path: Filemgr


19) Agile File Manager window: agileapp.[domain]:80


20) Agile File Manager Storage Location: e:\agile\agile9221\files


21) Select to create product icons in an new Program Group called: Agile


22) Install…


23) Restart the system


Agile Viewer Installation
1) From Agile Viewer installation directory execute: setup_win.exe


2) Accept the license agreement
3) Enter User name and License key
4) Check the Agile Viewer only


5) Select New Install


6) Location: d:\Agile\Agile9221


7) Select Regular Agile Viewer


8) Enter hostname & port: agileapp.[domain]:5099


9) Done


Deploy Agile application on Oracle Application Server
1) cd OraHome_1\opmn\bin
a. Stop all Oracle AS processes - opmnctl stopall
b. Start all Oracle AS processes - opmnctl startall
c. cd d:\agile\agile9221\agileDomain\bin
d. Execute command: DeployAgile


2) Verify deployment
a. cd \OraHome1\dcm\bin
b. dmctl listapplications


Verify Installation

1) Run in browser the following url: http://agileapp:7777/Agile/PLMServlet
2) Connect with admin user


Configure IIS as a Proxy Server for Agile PLM
1) Navigate to: Control Panel -> Administrative tools -> Internet Information Services (IIS) Manager


2) Right click on “Default Web Site” (under Web Sites) -> properties
3) Select the “Home Directory” tab
4) In the “Execute permissions” list, select “scripts and executables”


5) Select the “ISPAI filter” tab -> add
a. Filter Name: oproxy
b. Executable: D:\Agile\Agile9221\AgileProxies\oracle_proxy.dll


6) Right click on Default Web Site-> new -> Virtual directory


7) Alias: oproxy


8) Path: d:\agile\agile9221\AgileProxies


9) Check the read and execute options


10) Finish.
11) Navigate to “Web service extension” -> select: “all unknown ISAPI extensions and Click “Allow”


12) Navigate to: Control Panel -> Administrative tools -> Services
13) Restart the “IIS Admin Service”
14) Run in browser: http://agileapp/Agile/PLMServlet (without port 7777)
15) Logon with admin user to verify IIS configuration.


Configure File Manager with IIS
1) Edit d:\agile\agile9221\Tomcat\conf\server.xml
2) Look for the port after the following text:
!-- Define a Coyote/JK2 AJP 1.3 Connector on port 8009 --
3) Edit file jk2.properties -> channelSocket.port=8009 (the previous port)
4) Navigate to: Control Panel -> Administrative tools -> IIS Manager
5) Go to ISPAI Filter tab -> add
a. name: Jakarta IIS Connector
b. Executable: D:\Agile\Agile9221\AgileProxies\isapi_redirect.dll
6) Right click on default web site-> new -> Virtual directory
a. Alias : Jakarta
b. Path: d:\agile\agile9221\agileproxies
7) Check the read and executable options
8) Restart IIS Admin Service again.


Verify File Manager installation

1) Startup tomcat server by: d:\agile\agile9221\tomcat\bin\catalina start
2) Open the following url in browser to check Java installation on client: http://agileapp/JavaClient/start.html


3) In order to use the Agile java client we should install Java JRE 1.5.x
4) Open the following url again: http://agileapp/JavaClient/start.html
5) Click on Launch
6) Login with admin user.
7) Navigate to: Server setting -> locations
Verify all locations (especially under the File Manager tab)


Now when the Agile application node installed, the Agile system are ready for use.
If you have an initial dump file to export, you can do it now with agile9imp.bat script.